Webcam Surveyor - Getting started
Updated: May 27, 2023Webcam Surveyor is a universal solution for working with a web camera. With this software you can easily record video, take pictures from your camera, record a sequence of images in a video file, broadcast video to the network and use it for video surveillance.
Download the Webcam Surveyor installer and launch it and follow the instructions. After installation, you can run application and you'll see its interface:
User Interface
The application has a simple and intuitive interface. All the main functions are represented as buttons on the form, as in the player. To start an action, just click on the button. The "Stop" button stops or cancels any action.
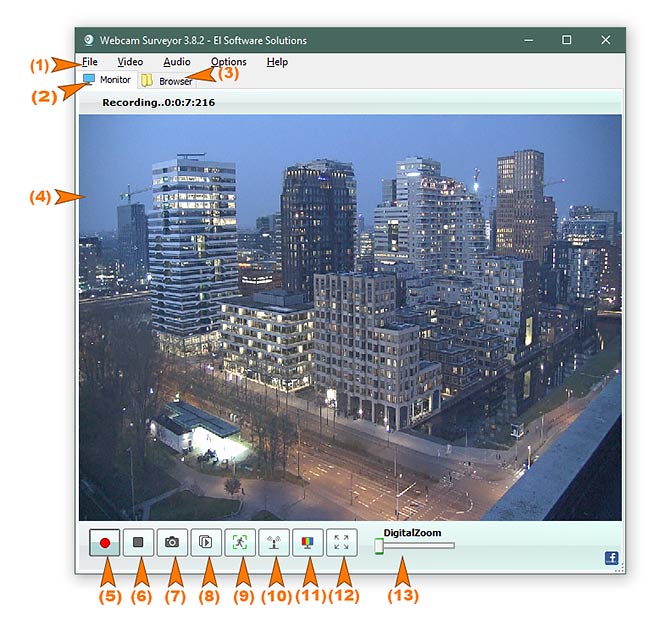
- The main menu;
- "Monitor" tab- here is the basic functionality for working with the web camera;
- "Browser" tab- here you will find the saved pictures and video files;
- Preview Window - for viewing the live image from the camera;
- "Start video capture" button;
- "Stop” button - allow stopping all operations with the camera;
- "Snapshot" button - take a snapshot from the camera;
- "Start capture a sequence of images" button - capture a time-lapse video or sequence of images;
- "Start Motion detection" button;
- "Broadcast video stream" button - start live streaming over Internet/local network;
- "Camera settings" button - webcam settings: brightness, contrast, exposure, etc;
- "Full Screen" button - enable / disable full-screen viewing;
- Digital zoom slider.
Stored videos and images can be found on the browser tab. Webcam Surveyor has a full-featured file browser that supports all the functions of Windows Explorer. You can manage your files directly from the application.
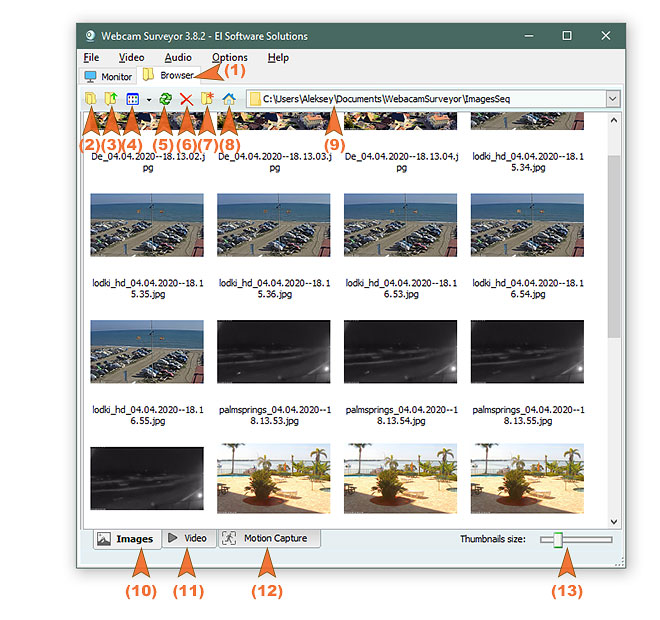
- "Browser" tab;
- "Folders" button - Show / Hide the folder s tree;
- "Level Up" button;
- "View Style" button - allows you to change the style of viewing files;
- "Refresh" button;
- "Delete Selected Item" button - Delete the selected files or folders;
- "Create New Folder" button;
- "Go to Default folder" button - allows you to quickly return to the default folder for current tab;
- File path combo box;
- "Images" tab - in this tab displays all the pictures and video files obtained with the Sequence Capture function, as well as the images taken when the clicked on "Snapshot" button. You can independently configure the path for this folder in the Program Options> Image Sequence > Store in folder.
- "Video" tab - this tab displays all recorded files, you can also change the default settings for this tab in the Program Options> Video> Store in folder.
- "Motion Capture" tab - here you will find video files and folders obtained by using the "Motion Capture" function. You can change the path for this folder here: Program Options> Motion Capture> Store in folder.
- The Thumbnail Size slider allows you to resize images in Thumbnail View mode.
The first launch of Webcam Surveyor
Before you run Webcam Surveyor, we recommended closing all applications using the camera. If you run the software for the first time, the program will automatically be connected to the camera and starts a preview image. If you do not see the image after the launch of the application, then you need to adjust format settings.
To to select or switch the camera, open: Main Menu>Video and click on the camera name.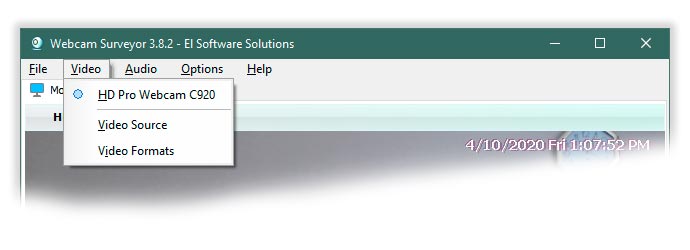
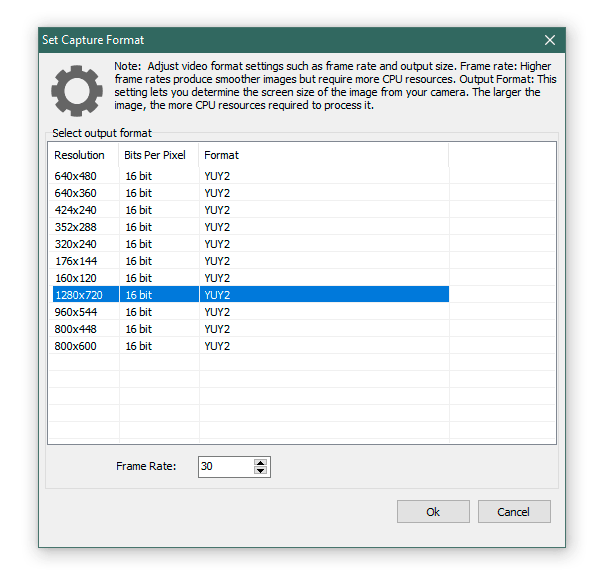
Adjusting Video Format settings: resolution and frame rate.
Before you start a capture, you can adjust the resolution and frame rate. To open the dialog box of video formats, open: Main Menu> Video> Video Formats.
To open the device properties dialog box go to: Main Menu> Video> Video Source. Also you can adjust camera settings such as contrast, brightness, and saturation by clicking on the Camera Settings button  . A control panel will appear that will allow you to adjust the camera settings. Click the blue arrows above the control panel to show other camera settings. Click on the Camera Settings again to hide the control panel.
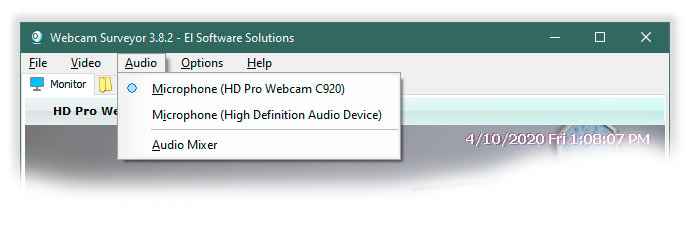
Select Audio source.
To select audio source open Main Menu>Audio and select audio device from list.